Extreme Makeover: Italian Edition
/As avid HGTV devotees, my husband and I had grand, romantic plans for buying and renovating a home in Sicily, where we would hope to retire. After all, we witnessed startling transformations of properties that looked ready for the wrecking ball on our frequent trips to Castellammare del Golfo only to return to find true beauties left in their place. This was a massive project, so I will document the details of this dramatic makeover in two blog posts.
Before & After
In November 2018, we kicked off our renovation project. The property we purchased is on the top floor and has private access to the roof, which has the same expansive footprint of the full-floor apartment below.
The fact that all the living space is on one floor makes it a unique find in Castellammare del Golfo, where most residences in the historic center are on multiple levels like a townhouse or brownstone.
Since this was such a large undertaking I will focus on the Main Floor Balcony Apartment renovation in this post. Be sure to sign up for our newsletter to get the follow-up post on the Penthouse Renovation!
Main Floor - The Balcony Apartment

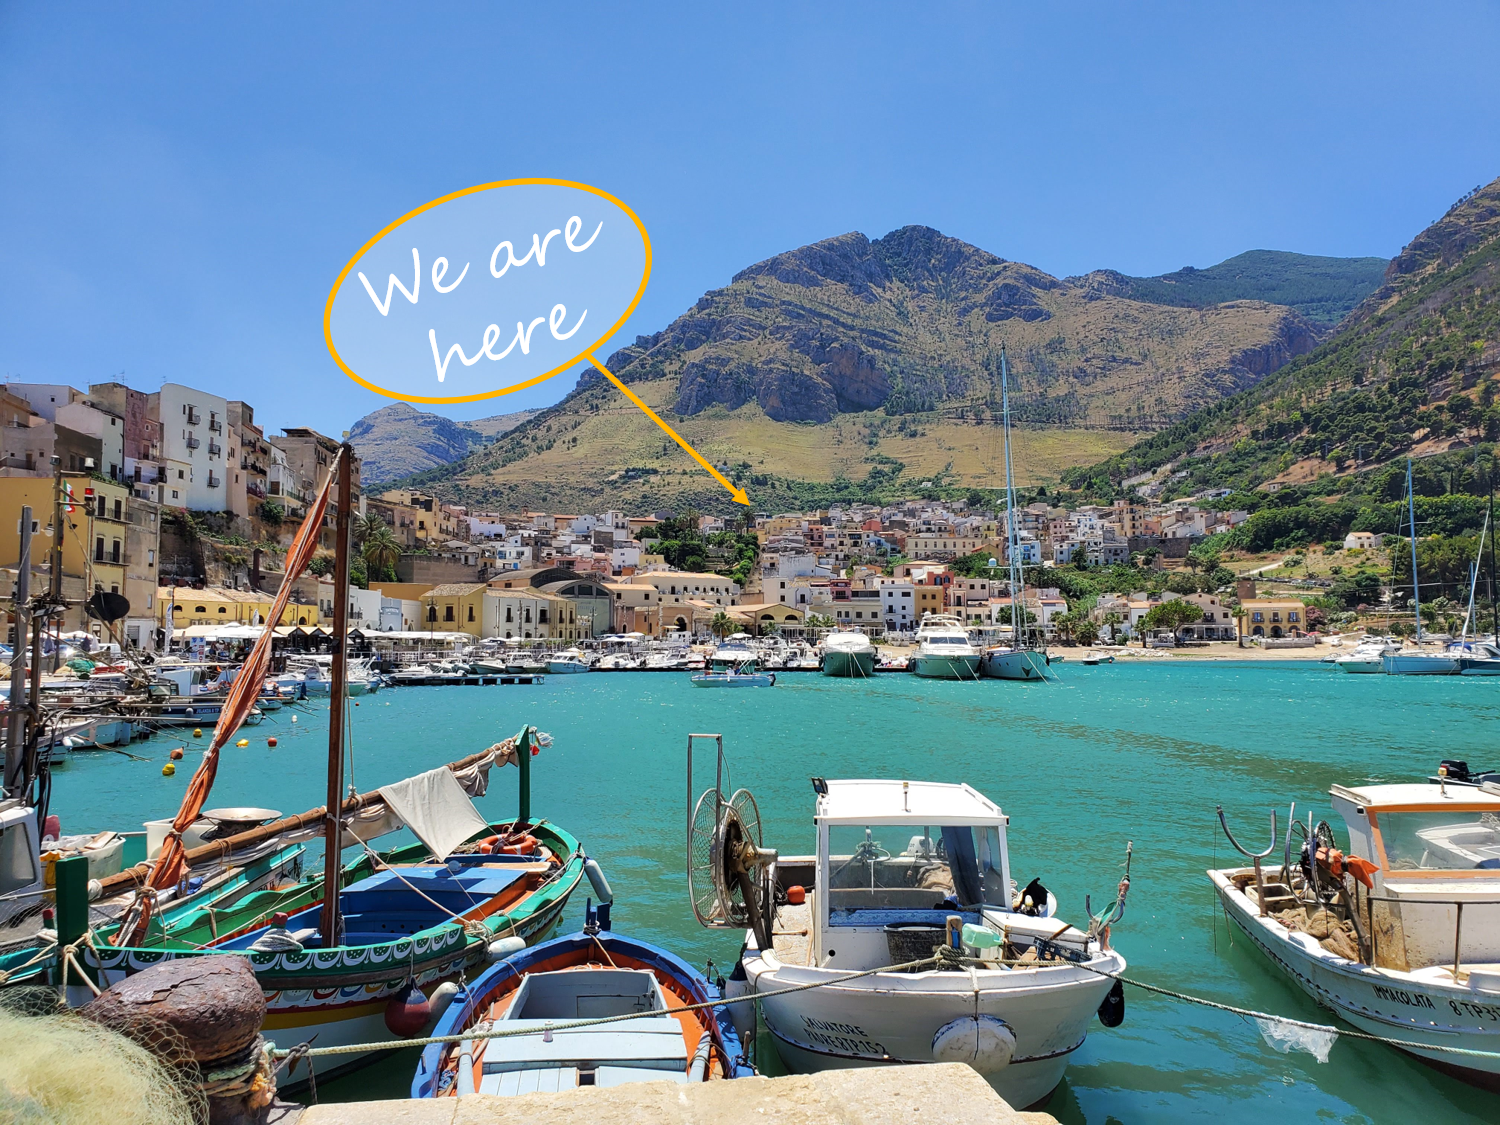
The View
When we visited the property for the first time, it had been abandoned for 11 years. The state of the place looked as though the family just got up and left one day after dinner but then occasionally came to dump their garbage.
It was not a great first impression. Even amid such disarray, we saw the potential of such an expansive floorplan. The apartment is 170 meters square or 1830 square feet, with high ceilings. However, what really sold us was the view and the central location.
We originally were not going to change very much to stay budget-conscious. However, we ultimately decided that since we were going to live here one day that we should go all-in and do a gut renovation rather than having to change everything later.
The original floorplan had four bedrooms, a big living room, two bathrooms, a small kitchen and a large dark entrance foyer with limited access to the most significant outdoor space in this apartment, to consider that all the bedrooms had access to balconies. In fact, the whole apartment was dark, which is quite shocking on an island known for its sunshine.

Main Floor Balcony Apartment Original Floorplan
The first thing we knew we had to do was to open the foyer in the living room and expand access to the balcony. There was an entrance from the original Salone and a small door from a bedroom, but none took advantage of the view. Below is a photo of the Salone or the original living room and dining room space.

Wide angle shot of the original Living Room area on the balcony Apartment
I know what you are thinking - this is one hot mess! I had to rely heavily on the other neighborhood transformations I had witnessed to keep faith in what we were attempting to do. Remember, in Europe, the houses are built in bricks and cement, not build with wood, like in America. Taking down walls is more complicated than when you watch HGTV where you can kick through drywall to create a new opening.

The Redesigned FLOOR PLAN
We decided to redesign this space completely. The new floorplan has five bedrooms with a more inviting entrance, open concept living area, and better overall flow.
The New Kitchen
We repurposed the letto or bedroom off the balcony and turned it into the kitchen to take advantage of the view and have convenient access from the kitchen for al fresco dining.

The original bedroom with access to the balcony.
Our open-concept design creates a bright and airy space flooded with sunlight that is much more functional.


Dov'è il Bagno?
The Balcony Apartment had two bathrooms in desperate need of full renovations.
The first bathroom was long, skinny, and dark. It was barely a meter (39 inches) wide. It had this strange, dropped ceiling that partially blocked the top of the window. The previous owner built this hard-to-get-to secret storage space only accessible from above the kitchen cabinets in the room next door.

Original Skinny Bathroom
We took down the false ceiling and expanded the bathroom into the original kitchen. I intended this room to serve as my office one day, but we have decided to make this a kids' bedroom until then.

Original messy kitchen


The second bathroom has a generous footprint, giving us more options for the layout.

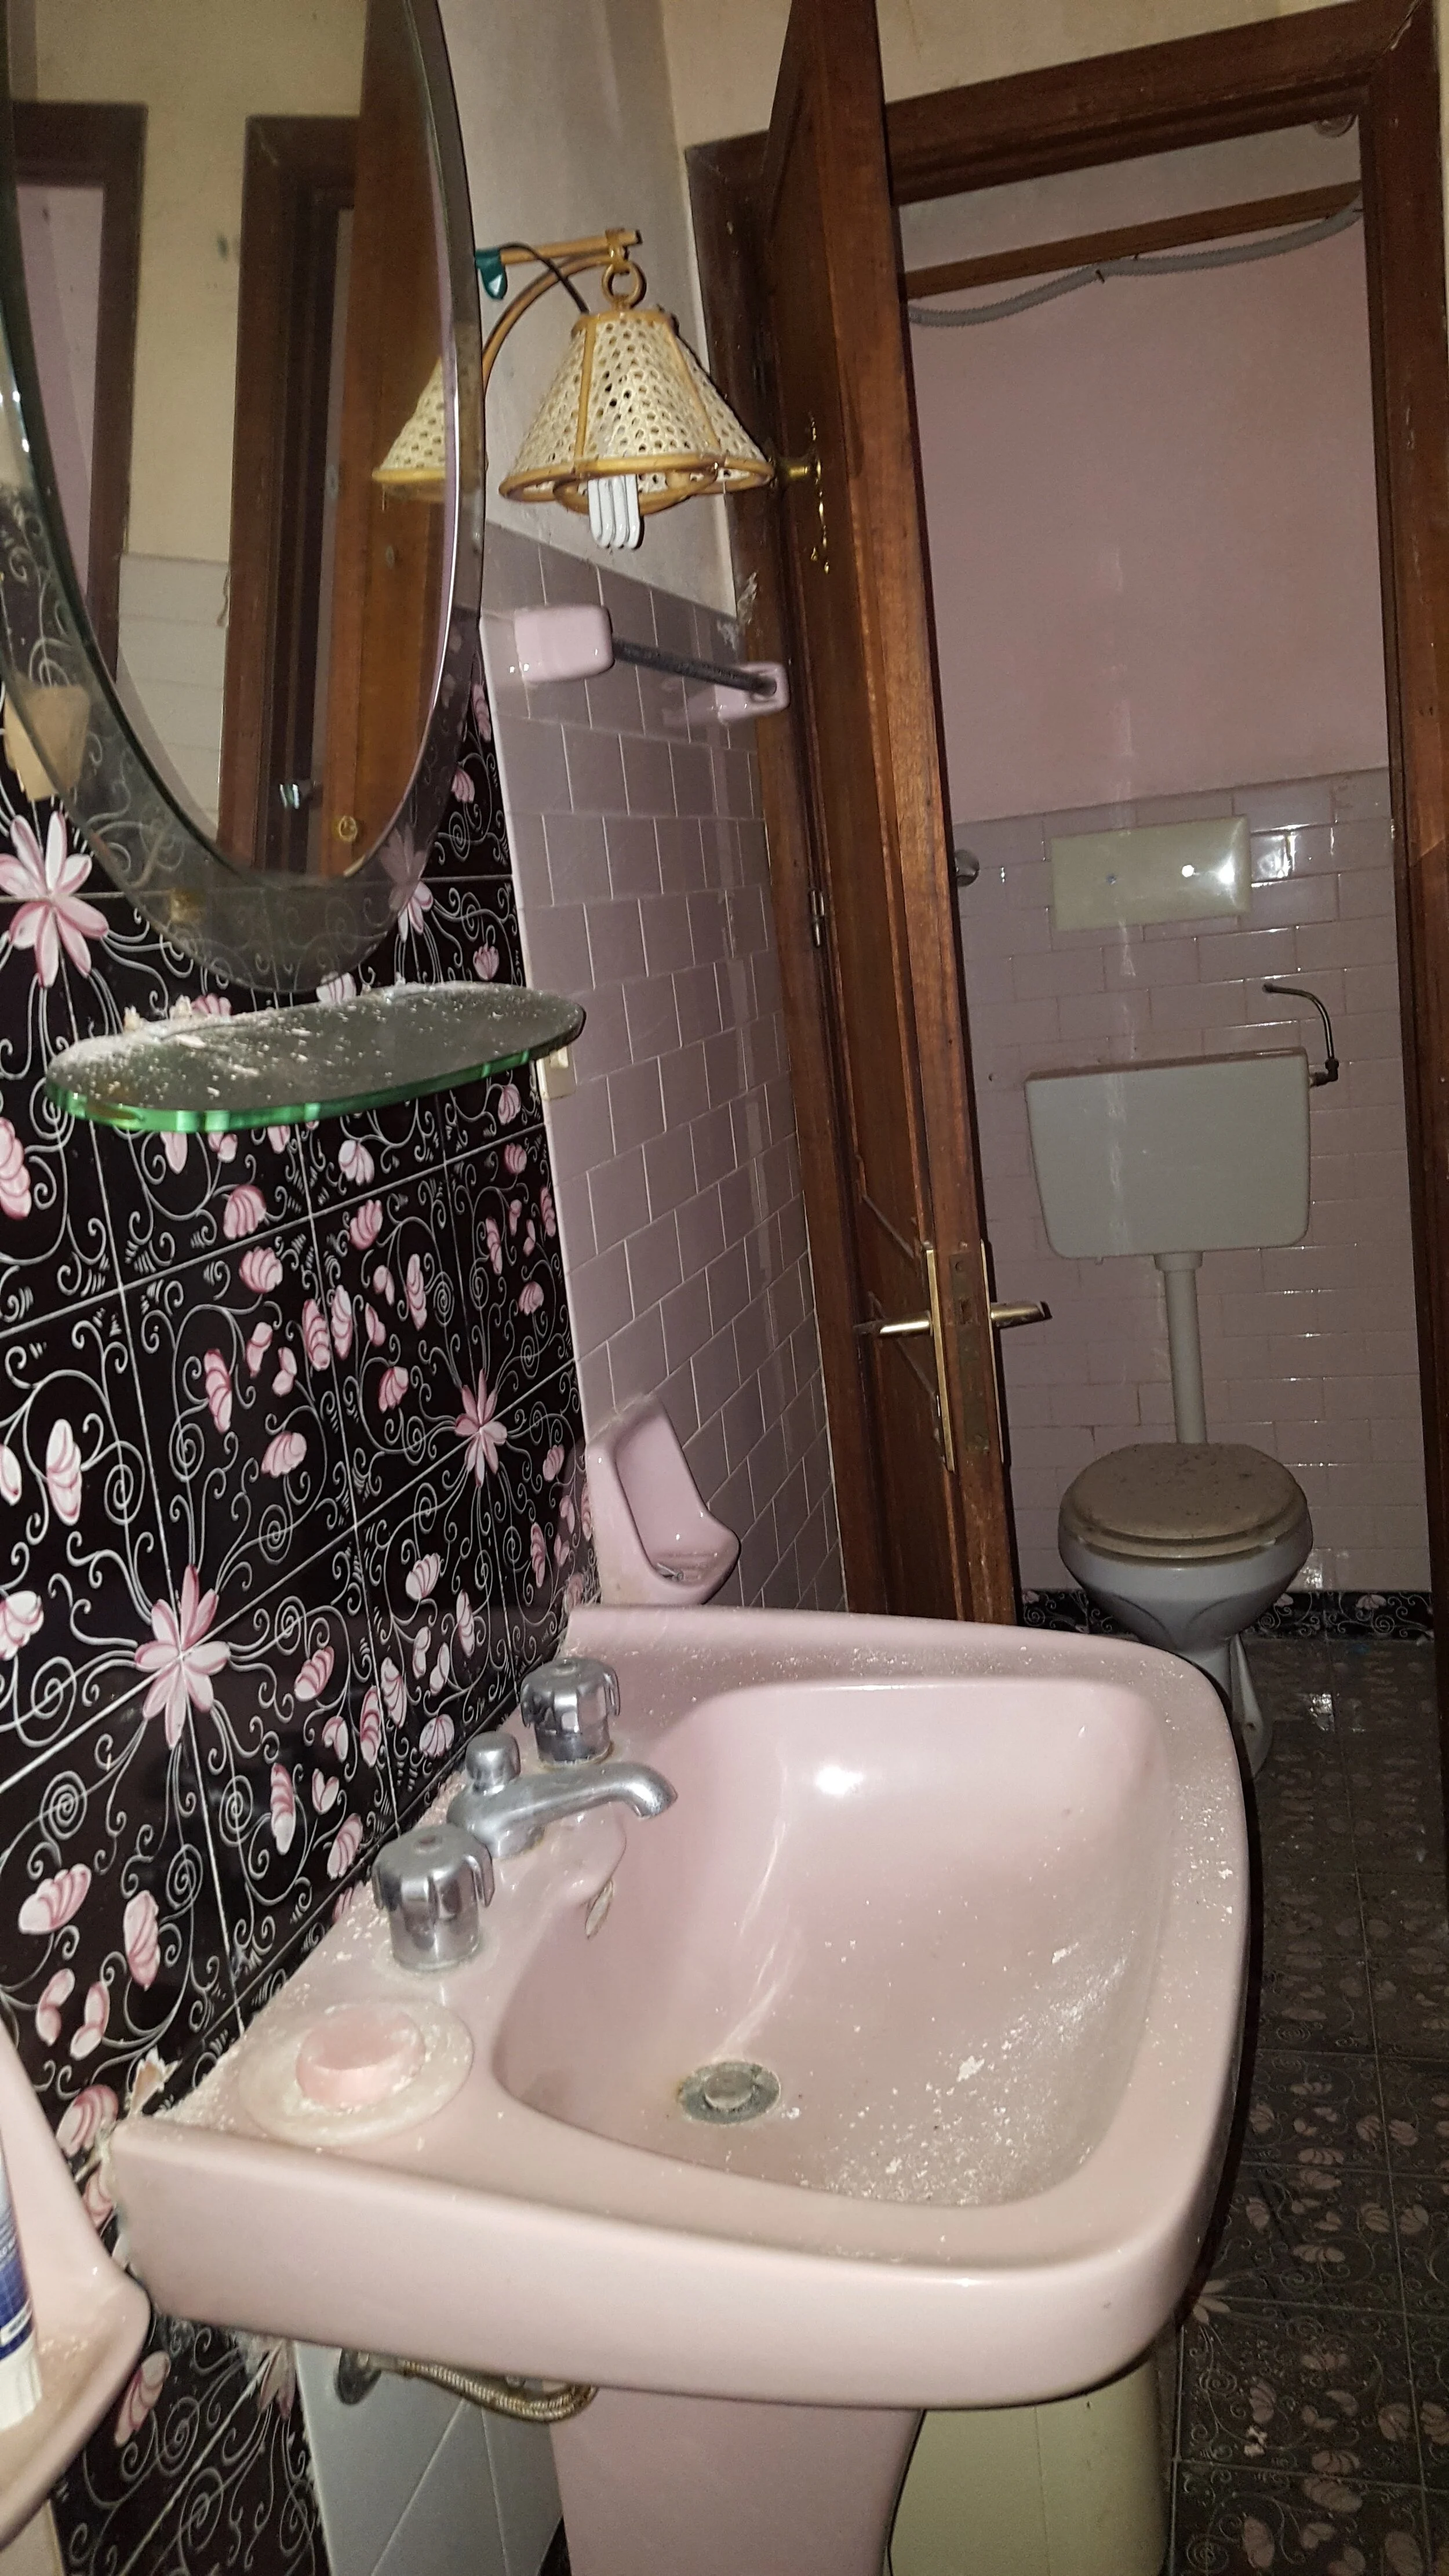
We ripped out the black and pink bathroom and eliminated the separate water closet, which was oddly open in the ceiling up to the roof! Our reconfigured floorplan allowed us to make room for a separate laundry and utility closet.

When we went to the marble quarry to pick out our kitchen countertops, we fell in love with this wavy green slab. Verde Lapponia is a kind of green quartzite quarried in Norway.
We decided it would be perfect for a bathroom.

We reworked the two other bedrooms, and we were able to enlarge the smaller one.


We were able to reconfigure the floorplan to gain more usable space and add a fifth bedroom off the living room.

Although we were initially going to keep some of the tiled floors to maintain some of the original character, I am quite pleased with the ceramic wood tile we laid throughout the home.

Front Entrance Facelift
We renovated the entire entrance of the building. All of the stairwells were re-plastered, the marble polished, and handrails refurbished. Our Geometra found this original arch we chose to expose and highlight this architectural detail rather than cover over.

Original Arch we chose to keep exposed
To give the exterior a more cohesive design, we repositioned many of the windows to align with the apartment below where we could.

Architectural designs of building facade on Via Roma
Every inch of this home was renovated. 100% of the plumbing, electrical, walls, and ceilings were replaced. We used 15 palettes of cement, each containing 50 bags. At 20 kg per bag, we calculated that we used 15,000 kgs (33,000 lbs) or 16.5 tons of cement!


How Italians Do Delivery
One of my favorite things about the renovation was all the videos our Geometra would send us of items getting transported to the job site. It's common in historic villages to use cranes to deliver things to the house. Whether its construction materials, furniture, ironwork, etc. they are all brought up by skillful operators used to maneuvering on narrow Italian streets. I never get tired of looking at these videos.